In a duel between junglers, wards are supreme. A jungler's ability to gank, counter-jungle, and control the map are largely dictated by where each team has placed wards. Knowing where to place wards and where the enemy has placed theirs is critical to the role of a jungler.
It's the uncertainty that junglers bring to a game that makes wards so important. Simply by being shrouded in the fog of war a jungler exerts pressure, curbing offensive action by forcing opponents to second guess whether engaging is safe. Any information that allows you to know or estimate the position and intention of the enemy jungler is extremely valuable.
From just one small piece of information you can infer many things. For example, consider a level 2 gank. By ganking so early a jungler reveals not only their position but that they have yet to clear half their jungle. An enterprising opponent will therefore beeline for the undefended jungle, punishing the ganker. The enemies in other lanes can also rachet up their aggression as they know they are safe. Simply by knowing a jungler's location a team gains a significant advantage.
With that in mind, here are some important ward locations:
Location #1: Wraiths
Warding the enemy's wraiths is possibly the single best investment a jungler can make. Because wraiths are the easiest camp the clear, the fastest to respawn, and centrally located a ward placed there is extremely likely to spot the enemy jungler. It also allows you to know if wraiths are available to be stolen, and provides early warning if someone is coming to stop your counter-jungling. You shouldn't ward your own wraiths unless it's too dangerous to ward a more advantageous location.
Location #2: Opposite from Wraiths
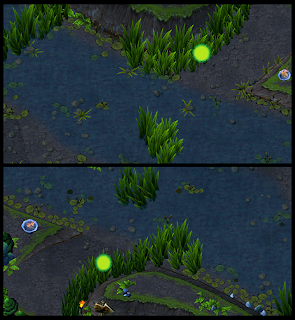
Any time you go to ward your own wraiths, think about warding here instead. These locations provide more information by also covering most of the river, protecting mid from jungle ganks, and protecting sidelanes from roaming opponents. The wards still cover the entirety of the ramp leading to wraiths, so it is impossible for an to sneak by them (without stealth).
With both locations 1 and 2 warded the most convenient paths for enemy junglers to counter-jungle are closed off. If you warded these locations first you can also guess when and if the enemy is placing similar wards. Combined with wards from top and bottom lanes it becomes impossible for the enemy jungler to leave their jungle unnoticed.
Location #3: Dragon
This is typically your support's responsibility, but in solo queue you can't guarantee that they'll consistently keep it warded. I've marked a few spots because dragon wards largely depend upon your side, blue or purple, and where your other wards are located. Pink wards, however, should almost always go in the marked spot. There are very few useful dragon ward locations which can't be seen from that spot.
There are many other good warding spots, but as a jungler these three are the most critical. With wards in these locations it becomes much easier to control the enemy jungler and their jungle. It's remarkable how much can be done when you know something as simple as the location of the enemy jungler.


No comments:
Post a Comment